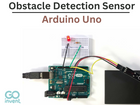
A critical safety measure that demands reliable and effective technology is the accurate detection of fire. In this blog post, we'll look at how to accurately detect fire using an Arduino and a flame sensor. We'll go over selecting threshold values for precise fire detection, developing fire detection code, and connecting the flame sensor to the Arduino. You can use Arduino and a flame sensor to build your own DIY fire alarm system by following these instructions. Let's get going!
Components of a Flame Sensor ?
A flame sensor is an electronic device that uses a photodiode or infrared (IR) receiver to detect the presence of fire or heat. The components of a flame sensor include :-
A sensor component that converts light energy into electrical energy and is often constructed of silicon.
An enclosure for the sensor component.
An LED that emits infrared radiation.
An amplifier circuit that amplifies the signal generated by the sensing element.
An output port to connect with Arduino.

Photo by Quartz components
Connecting the Flame Sensor to Arduino
To connect a flame sensor to Arduino, we follow the following steps :-
Begin by linking its output port to a digital pin on an Arduino board.
After that, attach its GND pin to one of Arduino's GND pins and its LED port to one of Arduino's 5V pins.
Next, connect each of the remaining pins on the flame sensor board to the corresponding pins on the breadboard using jumper wires: D0 and D0 go together, AO and A0 go together, and GND goes with GND.
Finally, plug in your power source (battery or wall adapter).

Photo by Fritzing
Your flame sensor should now be connected properly and ready for programming!
Setting the Threshold Values for Accurate Fire Detection
A flame sensor's sensitivity level can be adjusted by changing the resistance of its internal circuit components, such as resistors and capacitors. This modification aids in establishing a limit value that, if exceeded, will sound an alarm. You must have access to the internal circuit board in order to change the sensitivity level. Once you've determined where adjustments can be made, use a multimeter to measure voltage and resistance so that you can make the proper adjustments.
Using a Potentiometer with Arduino to Set Threshold Values
Another way of setting threshold values is by using a potentiometer and connecting it directly to your Arduino microcontroller. Instead of manually modifying internal circuit elements, the potentiometer enables you to precisely set the threshold levels for fire detection. You may vary the resistance applied to establish precise thresholds for fire detection by connecting the potentiometer's other two ends to ground (GND) and 5V ports on your Arduino board, respectively. Plug the potentiometer's one end directly into an analog port on your Arduino board.

Photo by Fritzing
Next, you'll need some C++ or Python code that regulates how often readings from each port on your Arduino board are obtained and when those readings should be utilized as a baseline for setting off alarms or alerts when their values surpass predetermined limitations specified by the potentiometer settings.
Arduino code for Flame Sensor
You may now start writing code to make your system accurately detect fire once the flame sensor is connected to your Arduino board as shown below :-
/* IR Flame Sensor Code
  Pins:
  VCC: 5V
  GND: GND
  D0: 2
*/


int SensorPin = 2;

void setup() {
  // set SensorPin as INPUT:
  Serial.begin(9600);
  pinMode(SensorPin, INPUT);
}

void loop() {
  // default mode for the sensor pin is HIGH. Here we are telling it
  // to do the opposite and print fire detected when sensor receives input
  // front a fire source:
  int buttonstate = digitalRead(SensorPin);
  if (buttonstate == LOW){
  Serial.println("fire detected");}
  if (buttonstate == HIGH){
  Serial.println("no fire detected");}

  delay(50);
}
Testing and Calibrating the Sensor
Before depending on your flame sensor with Arduino to detect fires effectively, it's necessary to test and calibrate your system appropriately. The accuracy of detection will depend on a number of variables, including distance, angle, type of fuel used for burning, etc. Tests at various angles, distances, and fuel kinds, such as wood or paper products, should be conducted to start; this will help identify the settings that are most effective in each situation. Moreover, try modifying the flame sensor's sensitivity settings using its potentiometer until you get precise readings that can be relied upon to detect fires.
Conclusion
All in all, the flame sensor is an effective instrument for fire detection using Arduino, to sum up. The flame sensor can be used for precise fire detection by making the right connections, adjusting the sensor's sensitivity level, and establishing the right threshold values with a potentiometer. The Arduino IDE makes it simple to write code for fire detection, and testing and calibrating the sensors will assist guarantee that they are operating properly.
You may utilize your flame sensor to reliably and rapidly detect fires by following the instructions provided in this blog post.


Comentários