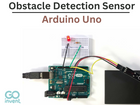
Are you seeking for a solution to improve the intellectual ability and effectiveness of your project? The solution might be an Arduino-connected obstacle detection sensor. This article will explain the benefits of installing an Arduino-based obstacle detection sensor, as well as the steps required to do it. With this understanding, you may use such sensors for projects ranging from robotics to home automation and benefit from the advantages they offer. So let's get started!

What is Obstacle Detection Sensor ?
An obstacle detection sensor is a device used to detect the presence of objects or obstacles in its vicinity. It can be used for applications such as navigation, security, and robotics. This type of sensor typically operates using either infrared (IR) light or ultrasonic sound waves. The most common type of obstacle detection sensor used with Arduino projects is the IR proximity sensor.

Advantages of Using an Arduino Obstacle Detection Sensor
It provides more precise readings than other types of sensors because it can measure both distance and direction at the same time.
They offer characteristics like sensitivity levels that can be adjusted, making them appropriate for usage.
They also require little wiring and can be simply programmed, making them simple to install and maintain over time.
Components required to set Up an Arduino Obstacle Detection Sensor.
To set up an Arduino obstacle detection sensor, you will need to assemble the necessary components. The components you will need include :-
Assembling the Components
Once you have all of your components ready to go, it’s time to start assembling them.
Install your Arduino microcontroller board into the breadboard first.
Next, use a wire to attach the microcontroller's power source to one side of the breadboard.
After that, attach another wire from this power source to ground on the opposite side of the breadboard.
Once your power source is properly plugged in, you can start adding other parts, including an LED or LCD display (if necessary) and any buttons or switches required for programming.
Programming the Arduino
Once all of your components are connected correctly to each other and powered on via USB cable from your computer (or another connection method), it’s time to program your Arduino microcontroller board so that it can detect obstacles using its ultrasonic range finder sensor :-
Before uploading any essential libraries to your board using an IDE program like Microsoft Studio Code or PlatformIO's Atom text editor, first download them to your computer from GitHub or other internet sources.
Then open up a new sketch file in whichever platform you decide is best suited for coding purposes; this could be either C++ or Python depending on what language works best for you at this stage in development.
Within this sketch file write out code that will instruct your microcontroller how specifically detect obstacles within its environment.
Arduino Code
// IR Obstacle Collision Detection Module
// Henry's Bench

int LED = 13; // Use the onboard Uno LED
int isObstaclePin = 7;  // This is our input pin
int isObstacle = HIGH;  // HIGH MEANS NO OBSTACLE

void setup() {
  pinMode(LED, OUTPUT);
  pinMode(isObstaclePin, INPUT);
  Serial.begin(9600);

}

void loop() {
  isObstacle = digitalRead(isObstaclePin);
  if (isObstacle == LOW)
  {
    Serial.println("OBSTACLE!!, OBSTACLE!!");
    digitalWrite(LED, HIGH);
  }
  else
  {
    Serial.println("clear");
    digitalWrite(LED, LOW);
  }
  delay(200);
}
Connecting the Obstacle Detection Sensor to the Arduino
The final step is connecting our obstacle detection sensor, the Ultrasonic Range Finder Sensor, into our system's setup using wires that run from digital pins 0–3 on our Arduino Microcontroller Board into their corresponding pins on our Ultrasonic Range Finder Sensor module, respectively. After that, we must also connect a 5V DC power source directly into both our Arduino Microcontroller Board and our Ultrasonic Range By this time, everything should have been linked successfully, allowing us to test the setup's functionality by running some simple test scripts inside the IDE platform that we are using.

Photo by Fritzing
Conclusion
In conclusion, adding a level of safety to any environment is simple and affordable by installing an Arduino obstacle detection sensor. Anyone may simply put up their own obstacle detection system with Arduino with the necessary parts, programming skills, and patience. Building more intelligent robots or other automated systems may become much easier as we learn how to use these sensors.


Comments